Scan Individual Artifacts
-
Log in to the Harbor interface with an account that has at least project administrator privileges.
-
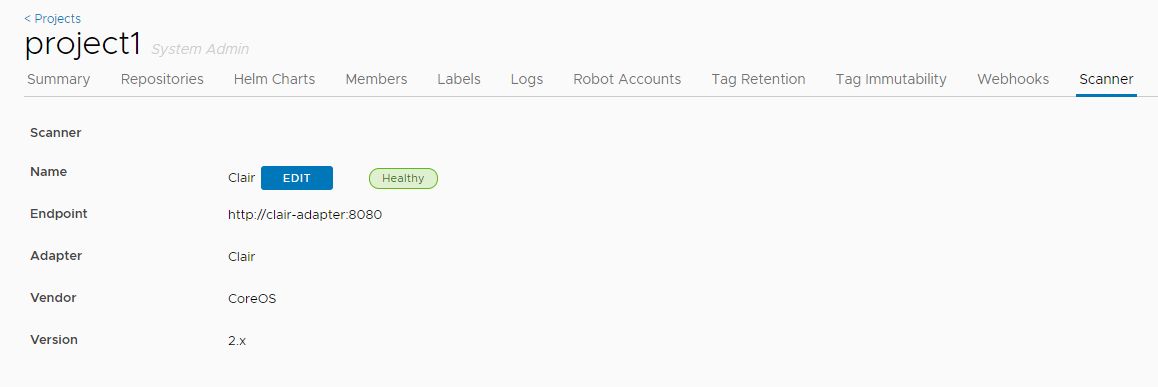
Go to Projects, select a project, and then click the Scanner tab.
The Scanner tab shows the details of the scanner that is currently set as the scanner to use for this project.
-
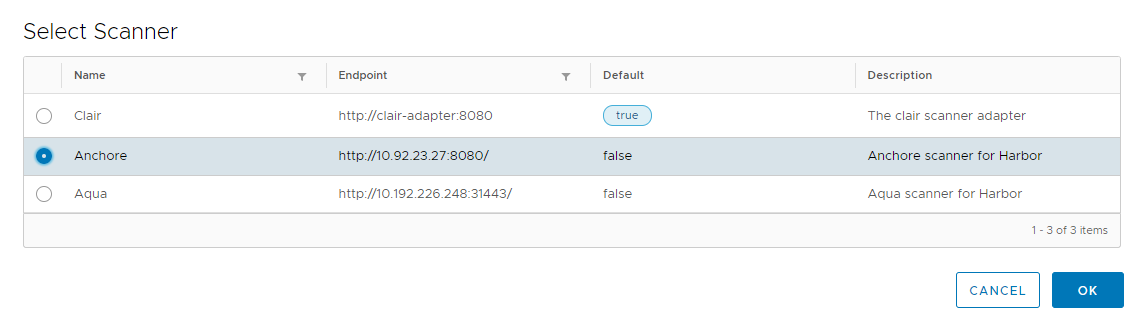
To select a different scanner from the list of scanners that are connected to this Harbor instance, click Select Scanner, choose the scanner you want to use, and then click OK.
 If you have selected the Prevent vulnerable images from running option in the project Configuration tab, the prevention of pulling vulnerable artifacts is determined by the scanner that is set in the project, or by the global default scanner if no scanner is configured specifically for the project. Different scanners might apply different levels of severity to artifact vulnerabilities.
 -
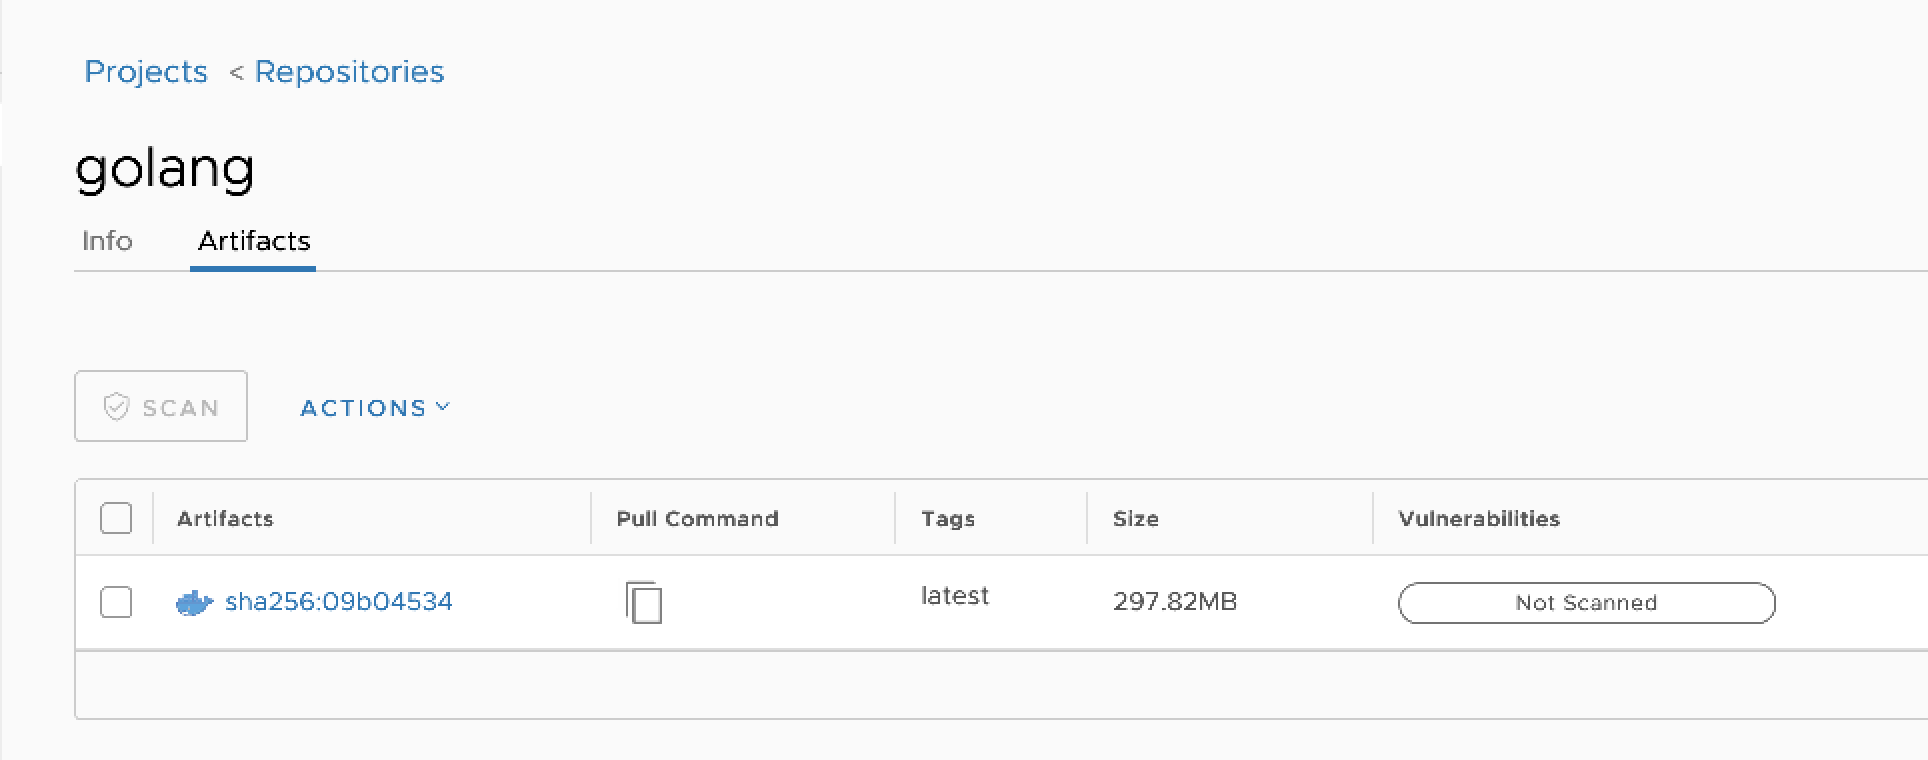
To see the vulnerabilities detected in repository artifacts, click the Repositories tab and then click on a repository.
For each artifact in the repository, the Vulnerabilities column displays the vulnerability scanning status and related information.
-
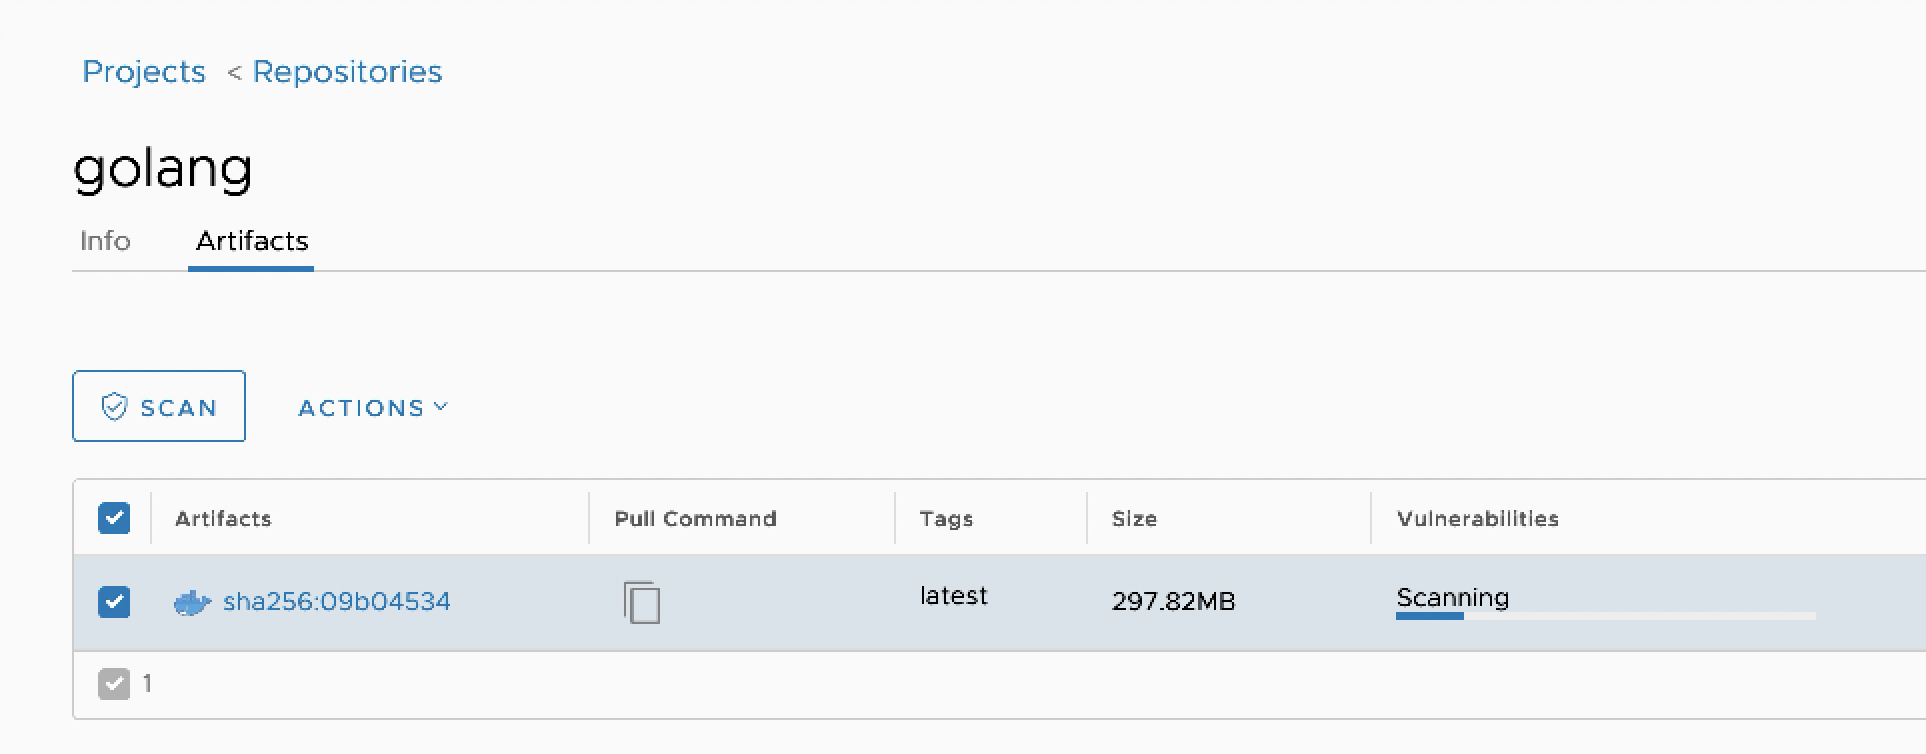
To run a vulnerability scan, select the artifacts to scan and then click the Scan button. You can optionally select the checkbox at the top to select all artifacts in the repository.
NOTE: You can start a scan at any time, unless the status is Queued or Scanning. If the database has not been fully populated, you should not run a scan. The following statuses are displayed in the Vulnerabilities column:
- Not Scanned: The artifact has never been scanned.
- Unsupported: The artifact is not supported by the scanner.
- Queued: The scanning task is scheduled but has not run yet.
- Scanning: The scanning task is in progress and a progress bar is displayed.
- View log: The scanning task failed to complete. Click the View Log link to view the related logs.
- Complete: The scanning task completed successfully.
If the process completes successfully, the result indicates the overall severity level, with the total number of vulnerabilities found for each severity level, and the number of fixable vulnerabilities.

- Red: At least one critical vulnerability found
- Orange: At least one high level vulnerability found
- Yellow: At least one medium level vulnerability found
- Blue: At least one low level vulnerability found
- Green: No vulnerabilities found
- Grey: Unknown vulnerabilities
-
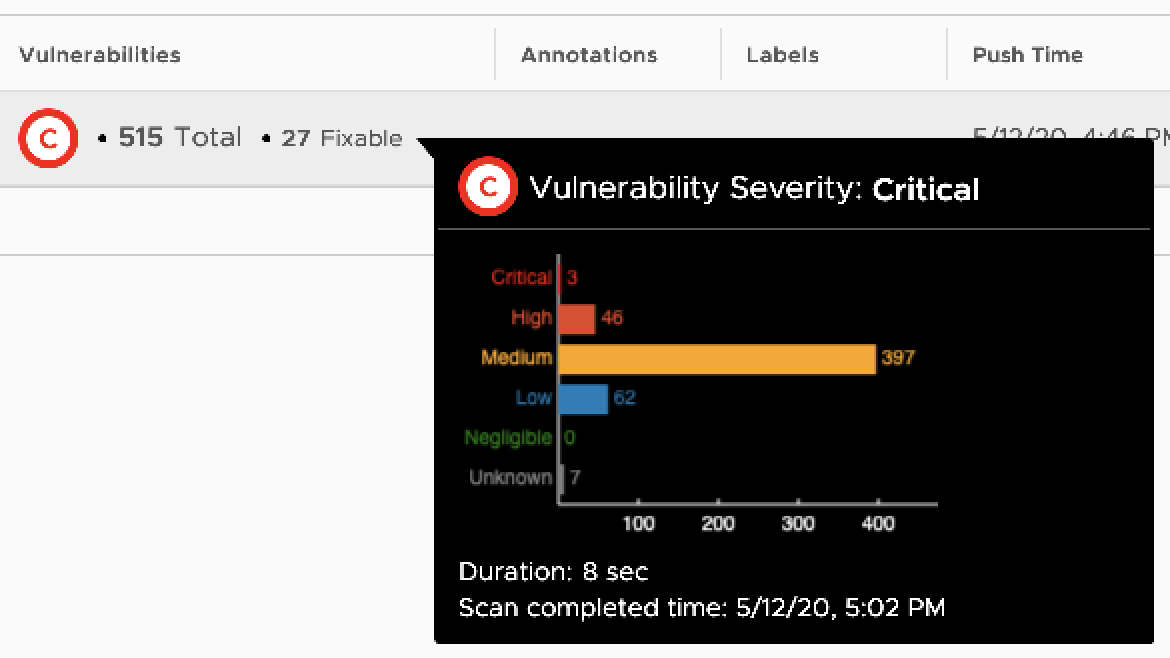
To see a summary of the vulnerability report, hover over the number of fixable vulnerabilities.
-
To see a detailed vulnerability report, click on the artifact digest.

In addition to information about the artifact, all of the vulnerabilities found in the last scan are listed. You can sort or filter the list by the different columns. You can also click Scan in the report page to run a scan on this artifact.
Vulnerability scanning for OCI image index
When scanning an OCI image index, Harbor sends scan requests to the scanner for each referenced artifact that is supported by the scanner. If the image scanning status of any referenced image is Scanning, the status for the OCI image index as a whole is also Scanning. The scan for the index is considered successful only if all referenced images are successfully scanned. It is considered limited successful when not all referenced images are successfully scanned, but at least one of referenced image is successfully scanned. Otherwise, it is considered failed.

When an OCI image index is successfully scanned, the summary of the vulnerability report for the OCI image index is aggregated from the individual scan results of the artifacts referenced by the index. The vulnerability report shows both sets of statistics.
On this page
Contributing